27 Jan 2007

How To Make Your Copied CD/DVDs Look Good

How To Make Your Copied CD/DVDs Look Good

Here is my guide on how to make the DVDs and CDs you copy look better!!
It's very simple, just folow these easy pointers.

1. Use Itunes or a simular program to burn an audio CD. This makes the track name come up instead of "Track 1", "Track 2", Etc.

2. Name your DVD before burning. It just makes the name come up when you put it in a computer, a good touch.

3. Get the proper cases. Buy CD cases for CDs and DVD cases for DVDs, Not only does it make them look better, it makes them fit into there respective stands.

4. Go to Cover Target and get the covers. They let you identify the CD/DVD and provide track names in the case of CDs and movie info in the case of DVDs

5. Make disc labels. I don't do this myself because of the cost, but a nice thing to do.

With these simple steps you can make your copies easyer to use and look nicer, so why not start now!!
Good luck with your copying!!

How To Make Quality Cd Rips, Detailed walkthrough

> How To Make Quality Cd Rips

EAC is an excellent proggy but it can be a little daunting to set up for a novice user. This should take care of all setup issues that are neccesary to make the best rips.

This was originally posted by Bliggy at Kerrazy-torrents.com so all the thanks goes to him...

Installing EAC:

Download Exact Audio Copy (EAC) http://www.exactaudiocopy.org/eac095pb5.zip
You'll need WinZIP or similar to extract the files. EAC does not have an installer so you may wish to extract it to the directory where you wish to keep it... For example C:\EAC or C:\Program Files\EAC

If you wish to make mp3s then you will need LAME.exe:
LAME version: 3.97 beta 2 (Win32 compile including lame_enc.dll and lameACM)
Extract it wherever u want to.

Go to your EAC directory and click on EAC.exe

The first time you run EAC the Setup Wizard will pop up.

Select which drive you wish to use. Click next.
Select "I prefer to have accurate results". Click Next
Select "I don't trust these values, detect the features for my drive". Click Next.
Insert any audio CD into your drive and click Next again to run the auto detect. Wait... click next and next again.

At this point you can choose to setup your mp3 encoder, LAME.exe. If you chose to do this then make sure the "Install and configure..." box is checked and click next. EAC will attempt to fine LAME.EXE on your HD... if it does not then point it to the directory that you unzipped it to by clicking the Browse button.

Check "Use LAME standard settings." and if you wish check "Let EAC create ID3 tags...". Click Next.

Enter an email address so EAC can connect to freedb for you ID3 tag info. Click Next.

Choose "I am an Expert...". Click Next.

Congrats! EAC is Installed!

NOW... before u get ready to rip...

Tweaking EAC to perfection!

Click EAC > EAC Options or Press F9

In the Extraction Tab:
Check "Fill up missing offset samples with silence"
Check "Synchronize between tracks"
In the "Error recovery quality" dropdown menu select "High"
Leave the rest unchecked.

In the General Tab:
Check "On unknown CDs" select "automatically access freedb database"
Other options here are set to personal preference.

In theTools Tab:
Uncheck "retrieve UPC/ISRC codes in CUE sheet generation"
Check "Use CD-Text information in CUE sheet generation"
Check "Create '.3mu' playlist on extraction" *Optional*
Check: Automatically write status report after extraction
Uncheck "Activate beginner mode, disable all advanced features"

In the Normalize tab:
Bliggy Say's... DO NOT USE NORMALIZE
Just my opinion but normalize is evil. Google if u wanna know more...

In the Filename Tab:
This is also up to you. Mine looks like this.

%A\%C\%N - %T

So, if your default directory is C:\Rips then you rip will save like this...
C:\Rips\Artist\Album\01 - SongTitle.wav/mp3

In the Directories Tab:
Set your default directory here.

In the Write Tab:
Uncheck everything.

Click OK to close the EAC Options window.

NOW....

Click EAC > Drive Options... or F10

In the Extraction Method tab:
Check "Secure mode with..."
Under that...
Check "Drive has 'Accurate Stream' feature"
Check "Drive caches audio data"
DO NOT Check "Drive is capable of retrieving C2 error information"

Do No not use Paranoid, Synchronized or Burst mode!

In the Offset/Speed tab:
(here's where it gets fun)

Select "Use read sample offset correction."
To determine which value is correct you must find what brand/type of drive you have. You can find out by doing the following...
Start > Control Panel > System > Click Hardware Tab > Click Device Manager > Click the + next to DVD/CD Rom Drive then note down your make and model.

Then go here... http://www.accuraterip.com/driveoffsets.htm
Hopefully you will find that your drive has been tested and confirmed
In my case i have a LITE-ON LTR-24102B so looking at the list I see my Read Offset is +12 so I go into EAC to the "Read Sample Offset Correction" field and enter +12. Always use the + or - when applicable.
IF your drive is not listed... I'm sorry. You can figure it out here. http://pages.cthome.net/homepage/eac/setup.htm

Uncheck "Overread into Lead-In and Lead-Out"
Check: Allow speed reduction during extraction

Well Done!

Now just put in a CD, let freedb find your CD, or enter the info manually, and click the WAV button. EAC is ready to extract perfect .wav files to your hard drive! From there you can use your favorite lossless/lossy converter and screw with it as you wish

Whats that? Want EAC to make your MP3s too? Lazy ass... well heres what ya do.

Click EAC > Compression Options or F11

In the External Compression tab:
Check "Use external program for compression"
In "Parameter Passing Scheme:" Select "LAME mp3 Encoder"
In "Use File Extension" type .mp3 (should be default)
Click Browse and point EAC to you LAME.EXE file if its not already loaded.
**Additional Command Lines See Below**
Set Bitrate to 192 (won't matter later)
Check "Delete wav after compression" optional
Uncheck "Use CRC Check" optional
Uncheck "Add ID3 tag" or it will give time-indication errors (the lame encoder will still add proper tagging).
Select High Quality

**Additional Command Lines***
For the sake of keeping things simple I'll give these options.
Copy any of these lines into the Additional Command Lines field:

--alt-preset standard
(Low/standard VBR)
--alt-preset extreme
(High VBR)
--alt-preset insane
(CBR@320)

Click OK to Exit the Compression Options Window
Insert you CD then click the MP3 button and wait for your (as perfect as possible) mp3s

If you wish your compressed audio to be in any other format or bitrate either..
A: Figure it out yourself.
or
B: Just use EAC to rip to wav then use a different program to encode.

Happy Ripping!

How To Burn .bin Files To Dvd - Using Nerovision Express Se

Hey, for all you people who got some movies which are in .bin format and want to burn them to Dvd instead of CD ( losing quality) heres my guide.


Tools : .bin (movie file)
Daemon tools
NeroVision Express SE


Step 1 : Open Daemon tools and mount the .bin file
Step 2 : Go to " My computer" and you will see a new drive that you mounted ( G: , J: etc)
Step 3: Open that drive and find a folder named VCD
Step 4: Take out the one file it should be around 700mb ( if you dont find it in VCD folder look in the other 3, the folder should only have 1 file)
Step 5: Extract that file to your desktop
Step 6: Rename the extention to .avi
Step 7: Open up NeroVision Express SE, click on make DVD, add the .avi file you just saved, click next, create/delete menu, change recording speed from MAX to 2x ( prevents skipping)
Step 8: Pop in A dvd and your off.


A good little guide from me to you :) Happy Burning

How to Speed up your torrents, Five steps that will help ....

Help! Bittorrent is slow… This is probably one of the most frequently questions asked about Bittorrent. Unfortunately there’s not some kind of magic trick that makes your torrents go through the roof. But you could take some simple steps to optimize your speeds.

1. Cap your uploads

Limit your upload speed to approximately 80 percent of your maximum upload rate. You can check your upload speed over here (never trust your isp). Once you know your maximum upload speed, change the max upload (to 80%) speed in your torrent client’s preferences.
Don’t get me wrong, everyone should share as much as possible, but if your upload rate reached it’s max, your download rate suffers significantly.

2. Hack the max TCP connections

If you’re on XP sp2, your TCP connections are limited to a maximum of 10. This seriously hurts your downloading speed because it wont let you connect to a high amount of ip numbers. It is supposed to slow down viruses because their spreading strategy is to connect to a high amount of ip numbers, but it also cripples your torrent downloads.
A nice way to fix this is to download this patch;
CODE
http://www.lvllord.de/?url=downloads〈=en
it allows you to set the maximum allowed connections to any number you want. Any number between 50 and 100 is ok (more on this here)
CODE
http://blog.davidkaspar.com/archives/2005/04/windows-xp-sp2-and-event-id-4226.php


3. Check seeds and peers

A simple tip, but o so important. Always look for torrents with the best seed/peer ratio. The more seeds (compared to peers) the better (in general). So 50 seeds and 50 peers is better than 500 seeds and 1000 peers. So, be selective.

4. Change the default port.

By default, bittorrent uses a port 6881-6999. Bittorrent accounts for a lot of the total internet traffic (1/3), so isp’s like to limit the connection offered on the these ports. So, you should change these to another range. Good clients allow you to do this, just choose anything you like. If you’re behind a router, make sure you have the ports forwarded or UPnP enabled.

5. Disable Windows Firewall (or at least configure it to allow exceptions)
It sucks. Windows Firewall hates P2P and often leads a life of it’s own. So disable it and get yourself a decent firewall, sygate or outpost for example.

Last but not least… Buy a faster connection… :P

I'd like to make 2 additions to this...

First, when capping your upload speed, remember that the BT protcol favors the faster connections. Basically, someone is more likely to give you the pieces you need, if you are giving them the pieces they need. Upload faster, download faster. So when capping your upload speed, don't think that setting REALLY low will help, because it won't. It will slow your downloading down as well. The 80% rule is just that, a RULE. Do it for the best performance.

Second, regarding the Windows firewall, I agree, it is not the best. Even after you disable it, it has a tendancy to turn itself back on from time to time, usually after you install Windows updates. So it is best to allow your BT client as an exeption, and/or add the port(s) you will be using to the exeptions, to allow for situations where it turns itself on without you knowing. That way, if it does, your torrenting can continue unabated.

How To Dual Boot Vista

How To Dual Boot Vista!

Dual booting Vista is really easy...

Requirements : Dvd Drive,Vista dvd,512+ ram,Acronis Disk Director Suite(or any partition manager),60+gb Computer,20+gb free space.


Use this tool to test for compatibility
CODE
http://www.microsoft.com/windowsvista/getready/upgradeadvisor/default.mspx


After Buring Vista to disc....Open your partition manager / Acronis Disk Director Suite.


Make it like 20+gb


Now Proceed within...then pop in vista dvd and install on that drive.


Now, once you restart your computer, you'll get a choice to boot into XP or Vista.


"Microsoft Windows" refers to Vista, and "Earlier version of Windows" refers to XP. The default choice is Vista, and you have 25 seconds to make another choice. Otherwise it boots into Vista automatically.

15 Jan 2007

Greek Bloggers Wanted

Any Greek Bloggers out there who want a cool site to host their blog(s) on can check out: www.blogology.gr
Offers 1 Gigabytes of free space
40 templates
photo albums
Podcasting
and more cool stuff
Ένα blog είναι ο δικός σας ιστοχώρος, όπου μπορείτε γρήγορα να τοποθετήσετε τις σκέψεις σας, να αλληλεπιδράσετε με άλλους, και περισσότερα. Όλά ΔΩΡΕΑΝ. Για όσους ξέρουν από blogging, σας προσφέρνουμε:1 Gigabyte (1000Mb) δωρεάν webspace, δικά σας Mailing Lists, στιγμιαία έκδοση, πάνω από 40 πρότυπα προεπιλογής, WYSIWYG συνθέτης υποβολών, RSS Feeds, μόνιμα links, Podcasting και πολλά άλλα...

12 Jan 2007

How to Increase Your Harddisk Speed

INCREASE HARDDISK SPEED

To speed up your hard disk speed we need to configure a special buffer in the computer's memory in order to enable it to better deal with interrupts made from the disk.
This tip is only recommended if you have 256MB RAM or higher.
Follow these steps:

Run SYSEDIT.EXE from the Run command.

Expand the system.ini file window.

Scroll down almost to the end of the file till you find a line called [386enh].

Press Enter to make one blank line, and in that line type

Irq14=4096

Note: This line IS CASE SENSITIVE!!!

Click on the File menu, then choose Save.

Close SYSEDIT and reboot your computer.

Done. Speed improvement will be noticed after the computer reboots.
Update: The most speed improvement is visible with IDE drives, however there are reports that this tweak also does good for SCSI disks. In any case, it won't harm your system, so why not try it yourself and let me know what you find.

How to Burn Movies With Nero [Working On Your DVD Player]

I am going to tell you one way of burning any movie you download so it plays on your home or any other DVD using NERO 7 ULTRA.

1. Open Nero Start Smart
2. Then go to Photo And Video section (up the top where the star is move across)
3. Then Select Make your own DVD-Video
4. Then Select Add Video Files and pick the movie you want to burn
5. after that custom create your menu (can add background, music etc..)
6. click next and see if its all working
7. put in a blank DVD and click next then it will start encoding your movie this normally takes 1-2 hours for the whole thing to complete depending on how long the movie is.

Video Tutorial:

How to Crack a Master Padlock

1) Get a Master Lock that you know the combination and if possible get another lock to test out if you doing it right.

2) First, we need to find the last number of the combination. To do this pull the “U” shaped thing away from the lock. It helps if its attached to something. (A Locker?). While pulling it out, start to rotate the dial from “0” so you know where to end later. You will notice that the lock will stick to a certain number. Now release the “U” for a second and then start to pull while you start to rotate again.

3) Next write down all the places the lock got stuck at while you were rotating it. There should be exactly 12 places if you did it right. One of these 12 numbers will be the last number of the combination.

4) Now we need to eliminate all of the numbers, but 1 to find the last. There are two types of places where the numbers you found got stuck at. First type is exactly on a number which means it won’t move left or right while pulling up the “U”. The second type is when the number you found was actually stuck between two numbers on the dial, and it would budge a little to the right or left.

5) Since we can determine, which of the 12 numbers were in between two numbers we can now eliminate them. There should have been 7 of those, which means there are only 5 left on you list.

6) Take a look at you list now and you should see that 4 of the 5 numbers left on you list have the same one’s place digit. (ex: 05, 15, 25, 35) These 4 numbers you found are fake and should be eliminated. This last number you have left should be the last number of you combination.

7) To find out the Master Lock Combination is easy now that you have the last digit. You now have 10 first digit possibilities and 10 second digit possibilities. This means you have to try out a maximum of 100 combinations. And don’t think that’s too many because this is much better than having to deal with 64,000 combinations.

How to get the books people sell on ebay for free

This website has links to free copies of all the ebooks that people sell on ebay

http://www.floodle.net/extra/ebayinfo/

How to make a shutdown timer

Step 1.
Right Click on your desktop and choose "New->Shortcut".

Step 2.
In the box that says "Type the location of the shortcut",
type in "shutdown -s -t 3600" with out the quotation marks
and click next.
Note: 3600 are the amount of seconds before your
computer shuts down. So, 60secs*60mins=3600secs.

Step 3.
Make up a name for the shortcut and you're done.
You can change the icon by right clicking->properities->change icon-> browse.

More Info:
-To make an abort key to stop the shutdown timer just create
another shortcut and make the "location of the shortcut"
to "shutdown -a" without the quotes.

How to Burn and Play PS2 and PSX Games

Welcome! In this guide, you will learn the very easy method of making copies of your PS2 and normal Playstation games so that they are playable on the PS2. This guide will provide you with all the information you need to burn PS2 games.

You will need the following things to burn PS2 games:

-a computer with a cd burner

-a blank cd-r (don’t use the re-recordable type a.k.a. cd-rw)

-CDRWIN – The version in this guide is 3.8D

-FireBurner –

-PS2 patcher –

-GameShark 2 for PS2 - the GameShark 2 is available at most stores that sell video games, a few examples would be Best Buy, Circuit City, or Target. You want version 1.0 of the GameShark 2. I have heard that all other versions work, but I have only tested version 1.0. GameShark2 costs about 29.95. Believe me, its worth it!!!

-and a PS2 to play the games.
Burning the PS2

The process of burning ps2 games is easy. It is really only a 3 step process.(read the game, patch the game, and burn the game.)

1) insert game into cd drive.

2) Open up CDRWIN and click on the extract disk/tracks/sectors button.

3) Your settings should be as follows:

For “extract mode” select disk image/ cue sheet

For “read options” select “raw”

For “error recovery” select “abort”

For “jitter correction” select “auto”

For “subcode analysis” select “auto”

Data Speed and Audio Speed should be the same

For “read retry count” type 0

For “subcode threshold” type 300

Make sure you selected the drive that your PS2 game is in

Make sure you typed in the file name (just type the name of the game) and Check the directory that you’re putting your file in.

Then just press “start”

If you get an error in the middle of reading the disk that says something like “can’t read sections xxxx-xxxxx of disk”, it is becase the disk is scratched and CDRWIN can’t read it. Try to clean the disk, if that doesn’t work you just have to use a different game (a different copy of the same game)

4) Once CDRWIN is done, click ok and then exit CDRWIN. Open up the PS2 patcher, select the game file you just created and patch it (make sure you select the “RAW” option.

5) Close the PS2 patcher, next open up Fireburner. Click on the visual cue burner button. When you created your .bin file (the game file) in CDRWIN, a .cue file should have automaticly been created. In that case, drag and drop the .cue file into the Fireburner window. If the .cue file was not created, just drag and drop the .bin file into the Fireburner window. After you have done that, right click (click with the right side button on your mouse) on your file in the Fireburner window, and select “Burn/Test burn”.

6) In the options window that appears, select your cdwriter, select your write speed(doesn’t really matter), and make sure you select “Track at once (TOA) for the recording method. As for the options on the right side of the options window, make sure only the following are checked: “eject cd” and “close session”.

When you have selected the options, click ok and your PS2 game will burn. That’s all you have to do to burn a game.
Burning a Playstion (PSone) game

1) If you want, you can spend 5 minutes using the same method as above to burn your playstation game, but its not necessary. For a playstation game (not PS2) all you need to do is use a program that lets you make an “exact copy” or a “backup disk (CDRWIN)” You don’t need any selected options, you just need to start the game on the PS2 the same way you would a PS2 game.
Starting the game on your PS2

1) Now for the fun part (and challenging part the first couple of times) This may sound a little complicated at first, but after you do it 3 or 4 times, it’s super easy. First things first, you must remove the front of your game drive on your PS2(not a big deal, it can snap on and off).

2) Now insert your gameshark 2 cd(make sure the gameshark memory card is in one of the 2 slots, doesn’t matter which one.)

3) In the gameshark options, choose “start game”, then “without”. Your screen should read “Please insert game disk then press X to continue.”

4) Now this part can be trickey for beginners, so I will provide pictures

-the main purpose of this starting method is to open up the PS2 and swap the gameshark disk with your burned game without the PS2 knowing you did it. DO NOT press the eject button on the PS2!!!

-with the PS2 cd tray cover removed, you will be able to look in and see a while tab inside the PS2. With a credit card (or something like it) gently slide the white tab all the way over to the right, if you did it correctly, this should allow you to manually pull open the PS2 cd tray.

5) Next, take the gameshark disk out of the PS2 and put in your burned game.

6) Gently push the PS2 cd tray fully back into the PS2 (Don’t press the eject button).

7) Now you need to slide that white tab all the way back to the left (its origional position). To do this you get a strong papper clip(needs to be a strong one) stick it into the PS2 on the right side of the white tab and push the tab back to the left.

8) If you pushed the tab all the way back to the left and did every thing else right, you are ready to play your game. Just press X on your PS2 controler and watch as your burned game loads. ( It may load slower than an original game, depending on the cd-r you are using, I use Verbatim cd-r’s and have no problems.)

9 Jan 2007

How To Send Anonymous E-mail

This summary is not available. Please click here to view the post.

How To Hack A PC Video


Here is a nice hacking video I found whilst browsing:

http://rapidshare.com/files/9683695/Full_1_.Session.mmc.Hacking-VID.rar

How To Speed Up Your Broadband Internet

Here are Registry Tweaks and Scroll down to see Patches

1.Increase bandwidth by tweaking QoS in Windows XP Pro

The following tweak applies only to Windows XP Professional edition.

The default system behavior is that all 100% bandwidth is available, however, if there is a running application that indicates to the OS it needs to send high priority/real time data, then as long as it has the socket open, Windows XP will restrict “best effort” traffic to 80% of the bandwidth so that high priority traffic can be accommodated. Basically, applications can make this request to the operating system for QoS support using the QoS application programming interfaces (APIs) in Windows and this only applies if a specific app is requesting QoS.

If you'd like to change how much bandwidth is reserved for QoS (the default is 20% of the total bandwidth), do the following:

1. Make sure you're logged in as "Administrator" (not just any account with admin privileges).
2. Navigate to START>Run and type: gpedit.msc
3. Navigate to Local Computer Policy > Administrative Templates > Network > QOS Packet Scheduler
4. In the right window, double-click the limit reservable bandwidth setting
5. On the setting tab, check the enabled setting.
6. Where it says "Bandwidth limit %", change it to read 0 (or whatever percentage you want to reserve for high priority QoS data)
7. Click OK, close gpedit.msc

Under START > My Computer > My Network Connections > View Network Connections, right-click on your connection and under Properties (where it lists your protocols), make sure QOS Packet Scheduler is enabled.

The tweak desribed below helps boost priority for DNS & hostname resolution in general. What this means is, it helps web pages load faster, and has negligible effect on downloads (not counting the couple of ms gain with the host resolution at connect-time).
Applying this tweak assumes some proficiency in editing the Windows Registry using Regedit (Start > Run > type: regedit). As always, backup your Registry before making any changes so you can revert to the previous state if you don't like the results.

2.Host Resolution Priority Tweak

host name resolution priority

Windows 2k/XP

First, open the Windows Registry using Regedit, and (after backing up) navigate to:

HKEY_LOCAL_MACHINE\SYSTEM\CurrentControlSet\Servic es\Tcpip\ServiceProvider

Note the following lines (all hex dwords):

Class = 008 (8) - indicates that TCP/IP is a name service provider, don't change.

LocalPriority = 1f3 (499) - local names cache

HostsPriority = 1f4 (500) - the HOSTS file

DnsPriority = 7d0 (2000) - DNS

NetbtPriority = 7d1 (2001) - NetBT name-resolution, including WINS

What we're aiming to do is increase the priority of the last 4 settings, while keeping their order. The valid range is from -32768 to +32767 and lower numbers mean higher priority compared to other services. What we're aiming at is lower numbers without going to extremes, something like what's shown below should work well:

Change the "Priority" lines to:

LocalPriority = 005 (5) - local names cache

HostsPriority = 006 (6) - the HOSTS file

DnsPriority = 007 (7) - DNS

NetbtPriority = 008 (8) - NetBT name-resolution, including WINS

Windows 9x/ME

The tweak is essentialy the same as in Windows 2000/XP, just the location in the Registry is slightly different. For a more detailed description see the Windows 2000/XP section above.

Open the Windows Registry using Regedit, and (after backing up) navigate to:

HKEY_LOCAL_MACHINE\System\CurrentControlSet\Servic es\VxD\MSTCP\ServiceProvider

You should see the following settings:

Class=hex:08,00,00,00

LocalPriority=hex:f3,01,00,00

HostsPriority=hex:f4,01,00,00

DnsPriority=hex:d0,07,00,00

NetbtPriority=hex:d1,07,00,00

The "priority" lines should be changed to:

LocalPriority=hex:05,00,00,00

HostsPriority=hex:06,00,00,00

DnsPriority=hex:07,00,00,00

NetbtPriority=hex:08,00,00,00

Reboot for changes to take effect.

In addition to the tweaks already covered in Win 2k/XP Registry Tweaks and More Win 2k/XP Tweaks, the Windows XP Service Pack 2 introduces a few new issues covered in the article below. Please make sure you understand what you are doing before making any changes to your Operating System. Note the information below only applies to Windows XP Service Pack 2.

3.Remove the limit on TCP connection attempts

Windws XP SP2 introduces a few new twists to TCP/IP in order to babysit users and "reduce the threat" of worms spreading fast without control. In one such attempt, the devs seem to have limited the number of possible TCP connection attempts per second to 10 (from unlimited in SP1). This argumentative feature can possibly affect server and P2P programs that need to open many outbound connections at the same time.

Rant: The forward thinking of Microsoft developers here is that you can only infect 10 new systems per second via TCP/IP ?!?... If you also consider that each of those infected computers will infect 10 others at the same rate:

second 1: 1+10 computers

second 2: 10+10*10 computers (110 new ones)

second 3: 10+100*10 computers ( 1110 new ones)

second 4: 10+1000*10 computers (11110 new ones)

....

all the way to 10*60 + 10^60 computers in a single minute (that's a number with 60 digits, or it would far exceed Earth's population). Even if we consider that 90% of those computers are unreachable/protected, one would still reach ALL of them within a minute.

In other words, even though it is not going to stop worm spreading, it's going to delay it a few seconds, limit possible network congestion a bit, and limit the use of your PC to 10 connection attempts per second in the process ! I have no problem with the new default setting limiting outbound connection attempts. Still, users should have the option to easily disable or change this setting. I might be going out on a limb here, but ever since the introduction of Windows XP I can't help thinking that I dislike all the bult-in Windows "wisardry" in a sense that the system also limits user access. That irritating trend to ease the mental load on end users is somewhat insulting, considering that Windows is to make the more "intelligent" choice instead of the end user, as well as limit their access to tuning such settings...

End of rant.

With the new implementation, if a P2P or some other network program attempts to connect to 100 sites at once, it would only be able to connect to 10 per second, so it would take it 10 seconds to reach all 100. In addition, even though the setting was registry editable in XP SP1, it is now only possible to edit by changing it directly in the system file tcpip.sys. To make matters worse, that file is in use, so you also need to be in Safe mode in order to edit it.

You only need to worry about the number of connection attempts per second if you have noticed a slowdown in network programs requiring a number of connections opened at once. You can check if you're hitting this limit from the Event Viewer, under System - look for TCP/IP Warnings saying: "TCP/IP has reached the security limit imposed on the number of concurrent TCP connect attempts". Keep in mind this is a cap only on incomplete outbound connect attempts per second, not total connections. Still, running servers and P2P programs can definitely be affected by this new limitation. Use the fix as you see fit.

To change or remove the limit, you can use the following program:

Event ID 4226 Patcher v2.11

http://www.speedguide.net/files/xp_sp2/EvID4226Patch211a-en.zip
- A patching program for removing or changing the limit imposed on connection attempts in SP2. The patcher has the ability to restore tcpip.sys back to the original... Still, you might want to back up tcpip.sys, use it at your own risk. The author of this patch can be reached @ _http://www.lvllord.de/

4. Recommended settings for Windows 2000 / XP

Windows 2000 & XP, unlike NT supports large windows as described in RFC1323 ( the 'RcvWindow' has a maximum value of 2**30 rather than 64K), and includes some other improvements over its predecessors you can use to speed up any TCP/IP transfers. , the descriptions and other options are added to provide you with better understanding and enable you to customize your settings.

All the following entries, unless otherwise noted should be placed in the Windows 2000/XP Registry under the key

HKEY_LOCAL_MACHINE\SYSTEM\CurrentControlSet\Servic es\Tcpip\Parameters
TCPWindowSize

The value of TCP Window in the Windows 2000 Registry is DWORD, representing number of bytes, with range from 0 to 2^30. The recommended values (in red) optimize TCP for any high speed Internet connection and work best in most cases, however if you'd like to use a custom value follow these guidelines:

For best results, the TCPWindow should be a multiple of MSS (Maximum Segment Size). MSS is generally MTU - 40, where MTU (Maximum Transmission Unit) is the largest packet size that can be transmitted. MTU is usually 1500 (1492 for PPPoE connections). To determine the MTU value of your ISP, check out the Advanced Registry Editing section of our site.

There are three places in the Windows 2000 Registry where you can add the TCP Window parameter.

HKLM/SYSTEM\CurrentControlSet\Services\Tcpip\Parameters

GlobalMaxTcpWindowSize="256960" (DWORD, number of bytes) Valid range is from MSS to 2^30. Add the value as a decimal. Note: For best results RWIN has to be a multiple of MSS lower than 65535 times a scale factor that's a power of 2, i.e. 44 x 1460 = 64240 x 2^2 = 256960. If you choose to use a RWIN lower than 65535, you can simply make it multiple of MSS and turn scaling off (Tcp1323Opts=0)

HKLM\SYSTEM\CurrentControlSet\Services\Tcpip\Param eters

TcpWindowSize="256960" (DWORD, number of bytes) Valid range is from MSS to 2^30. Add the value as a decimal. TcpWindowSize can also exist under TcpipParametersInterface - if added at this location, it overrides the global setting for this particular . Note (10/20/00): Seems MS has found another bug in Windows 2000, the TCPWindowSize should be configured with the global setting (GlobalMaxTcpWindowsSize) rather than this one - Q263088

Note: For best results RWIN has to be a multiple of MSS lower than 65535 times a scale factor that's a power of 2, i.e. 44 x 1460 = 64240 x 2^2 = 256960. If you choose to use a RWIN lower than 65535, you can simply make it multiple of MSS and turn scaling off (Tcp1323Opts=0)

Tcp1323Opts

Tcp1323Opts is a necessary setting in order to enable Large TCPWindow support as described in RFC 1323. Without this parameter, the TCPWindow is limited to 64K.

HKLM\SYSTEM\CurrentControlSet\Services\Tcpip\Param eters

Tcp1323Opts="1" (DWORD, recommended setting is 1. The possible settings are 0 - Disable RFC 1323 options, 1 - Window scaling but no Timestamp options, 3 - Window scaling and Time stamp options.)

Note: Tcp1323Opts="3" might help in some cases where there is increased packet loss, however generally you'll achieve better throughput with Tcp1323Opts="1", since Timestamps add 12 bytes to the header of each packet.

DefaultTTL

DefaultTTL determines the time in seconds and the number of hops a packet lives. While it does not directly affect speed, a larger value increases the amount of time it takes for a packet to be considered lost, discarded and retransmitted. A value that's too small can cause packets to be unable to reach distant servers at all.

HKLM\SYSTEM\CurrentControlSet\Services\Tcpip\Param eters

DefaultTTL="64" (DWORD, recommended setting is 64. Other settings that are widely used are 128 and 32)

EnablePMTUDiscovery

When set to 1 (True), TCP attempts to discover MTU automatically over the path to a remote host. Setting this parameter to 0 causes MTU to default to 576 which reduces overall performance over high speed connections. Note that this setting is different than our Windows 9x recommendation.

HKLM\SYSTEM\CurrentControlSet\Services\Tcpip\Param eters

EnablePMTUDiscovery="1" (DWORD - boolean, valid settings are 0-->False and 1-->True. Many connections perform better with this entry at 1, however, if you prefer to set your upstream to send fixed 1500 packets, you might want to use 0 instead). When set at 1, establishing connections and initial transfer speed might slow down a bit, however you will get better throughput if somewhere in the path large packets need to be fragmented.

EnablePMTUBHDetect

Setting this parameter to 1 (True) enables "black hole" routers to be detected, however it also increases the maximum number of retransmissions for a given segment. In most cases you'd want to keep BHDetect to 0 (False).

HKLM\SYSTEM\CurrentControlSet\Services\Tcpip\Param eters
EnablePMTUBHDetect="0" (DWORD - boolean, valid settings are 0-->False and 1-->True. Recommended setting is 0)

SackOpts

This parameter controls whether or not SACK (Selective Acknowledgement) support is enabled, as specified in RFC 2018. SACK is especially important for connections using large TCP Window sizes.


HKLM\SYSTEM\CurrentControlSet\Services\Tcpip\Param eters

SackOpts="1" (DWORD - boolean, recommended setting is 1. Possible settings are 0 - No Sack options or 1 - Sack Option enabled).

TcpMaxDupAcks

This parameter determines the number of duplicate ACKs that must be received for the same sequence number of sent data before "fast retransmit" is triggered to resend the segment that has been dropped in transit.

HKLM\SYSTEM\CurrentControlSet\Services\Tcpip\Param eters
TcpMaxDupAcks="2" (DWORD - range 1-3, recommended setting is 2).

Patches

This Includes
1. sguide_tweak_2k.zip
Description: Generic patch for Windows XP and Windows 2000 (all versions). This patch will optimize your TCP/IP Registry settings for high speed Internet connections. To install, extract the .inf file first, then double-click (or right-click on filename and choose install from the pull-down menu) and reboot for changes to take effect.

http://www.speedguide.net/files/sguide_tweak_2k.zip

2.sguide_tweak_2k_pppoe.zip


Description: Generic patch for Windows XP/2000 and DSL connections using PPPoE. This patch will optimize your TCP/IP Registry settings for high speed Internet connections. It is specifically designed for PPPoE DSL connections. To install, extract the .inf file first, then double-click (or right-click on filename and choose install from the pull-down menu) and reboot for changes to take effect.

http://www.speedguide.net/files/sguide_tweak_2k_pppoe.zip
3. winxp_dnscache.zip

Description: Patch Windows 2k/XP not to cache failed DNS entries. By default, when a DNS lookup fails (due to temporary DNS problems), Windows still caches the unsuccessful DNS query, and in turn fails to connect to a host regardless of the fact that the DNS server might be able to handle your lookup seconds later. This patch fixes the problem by configuring the DNS client to continue sending queries to an unresponsive network. To install, save to your HD, unzip the .reg file, then double-click the filename.

Web Patches - faster loading of Web Pages

The following patch increases Web page loading speed, by doubling the number of possible concurrent open connections. For example, imagine a web page has 20 images and some text - in order for your browser to get all these files, it opens 2 or 4 concurrent connections, depending on the Web server. Increasing the number of open connections allows for faster retrieving of the data. Please note that the patch sets some values outside of the HTML specs. If you decide to install it, backup your Registry first. Changes will take effect after you reboot. Download the patch appropriate for your OS:

OS: Windows 9x/ME

http://www.speedguide.net/files/sg_webtweak_9x.zip

OS: Windows 2K/XP/2k3

http://www.speedguide.net/files/sg_webtweak_2k.zip
TCP OPTIMISER


Description: The TCP Optimizer is a free, easy Windows program that provides an intuitive interface for tuning and optimizing your Internet connection. Just download and run, there is no installaion required. The program makes it easy to find the best MTU and RWIN values, test latency and tweak all the important broadband related registry parameters. The Optimizer can be helpful with tuning any Internet connection type, from dialup to Gigabit+

http://www.speedguide.net/files/TCPOptimizer.exe
ENJOY !!!!!!!!!!

8 Jan 2007

List Of Useful Windows XP Keyboard Shortcuts

Keyboard shortcuts are a great way to keep things moving when you're using your computer, and they let you perform tasks without lifting your hands from the keyboard. These are some of the basics that you should know--at least if you want to cut down on the number of times you reach for the mouse every day.

1. Ctrl Alt Del is the mother of all keyboard shortcuts, affectionately known as the "three-fingered salute," since it's so useful when your Windows box locks up. Pressing the combo once (simultaneously) opens the Windows Task Manager. (From within the Task Manager, you can force-quit a crashed program, see a list of processes or applications running on your machine, check performance parameters such as how hard your CPU is working, or track your network usage.) Is your machine totally locked up? Reach over, grab the mouse and click Shut Down.

2. Ctrl S saves the file you're working on. Ever lost your homework, a spreadsheet at work, or some video you've been editing? Hit Ctrl S (simultaneously) to save. Hit it early and often! (Want to open a file from within the program you're running? Ctrl O universally opens the File/Open window.)

3. Ctrl C copies text, files, or icons that you've highlighted, Ctrl V pastes them where you point your mouse (hey, you can't completely eliminate using it), and Ctrl X cuts whatever you've highlighted out of the document (or folder, photo, movie clip, or whatever it is you're working on). Ctrl A highlights the entire file you're working on or everything in a folder or on your desktop.

4. Alt Tab lets you switch on the fly between all of your open windows. Press the combination once to switch to your last open window or multiple times to switch to any other open window. Holding down Alt Tab will bring up a system window that shows you what apps are running and which one you're switching to.

5. Ever wonder why almost every Windows program has the F in File underlined, not to mention the E in Edit, and so on so forth across the top of the Window? Hit Alt that letter to open that particular menu; you can either use the arrow keys to move around within that window, or keep your eyes peeled for more underlined letters to use more Alt key combinations.

6. The Windows key (the one that looks like the Windows logo, or a flag) R opens the Run dialog. From here, you can launch a command-line window by typing cmd, but you can do a lot more. You can, for example, paste in a folder path, such as C:\Documents and Settings\[username]\My Documents\Expenses, and Windows will open it automatically. You can also use the Run dialog to open Microsoft applications such as Word, Excel, or Notepad. Just type winword to launch Word, type excel to launch Excel, and notepad to launch Notepad.

7. Windows E launches Windows Explorer, defaulting to My Computer.

8. F2 renames a selected file or folder. (This is so much easier than right-clicking!)

9. F3 launches Search if you're on the desktop or in a folder.

10. Windows M minimizes all open windows, and Windows D shows your desktop. (These results look similar, but they're slightly different; Windows M minimizes all windows that support the command, while Windows D actually raises the desktop to the top.) This is a great one for when the boss pops up in your cubicle. Once the boss gone, hit Shift Windows M to bring up your minimized windows, or Windows D to drop your desktop back down again.

How To Download Music For Free Using Windows Media Player

Are you scared that the RIAA is about to track you down for illegally downloading songs.
Well, here is a method of obtaining many songs absolutely free that is virtually untrackable
by modern technology. This has to do with capturing streaming audio, which in many cases, believe it or not
are plain old mp3s just waiting for you to "download." I have found most of the current top-40 as well as many others you may like, so keep searching. The music is waiting for you to find it.

Step 1:
First of all, you need to find a good site that hosts streaming audio. My favorite that has brought me many songs to date is hxxp://www.windowsmedia.com . Some others are just as good, but this is the site that I will be referencing (plus, I know you guys love to steal from Microsoft).

Step 2:
Alright, go up to the left hand corner where there is an empty text box. This is the search box, just fill it with a songname or artist just like you would in kazaa and click search. This will bring up a page with links to many websites hosting a stream by that artist. The ones with music notes are just that...music, this is what you want. In many cases, this is all you need. Just right click on one of the links and click "save as" to save the song. This works if the file extension is .mp3 or .wma or .asf or well-other known formats. If this worked, you are finished, otherwise continue reading.
Step 3:
However, if you encounter a .asx file, there are a few more steps you will have to endure. First of all, do exactly like the above example and save the file locally. After the file is downloaded, check to see how large the file is. If it is a large file in the megabyte range, then you should be able to play it in your favorite music program. However, if it is less than 1 kilobyte, open it as a textfile. You will then see many script commands that communicate to windows media player. Don't worry about these, just look for some URLs which will most likely be pointing to a .asf file. It will have at least one if not more. Open the new found URL in your browser and save it like in step 2 and you should be good to go. (I use Mozilla, because Internet Explorer likes to open things rather than save them as I tell it)

NOTE: If any of the URLs are preceded with "mms://" instead of "http://" find another URL, because this technique will not work.

This technique is especially useful to avoid prosecution because streaming audio, and downloading it appear the same to a web server, therefore you are seen as just another "legal" listener, so "download" away my friend and don't blame me if this soon becomes illegal (if it isn't already).

Step 4:
If you are picky then search for a program that will convert these file types to mp3s. I assure you there are many sites out there.

If this technique does not work for some reason, there is another technique which is manually recording streaming audio, with an audio capture program. I use the one that came with my soundcard (Audigy 2ZS, great soundcard), but I would recommend it only as a last resort such as with "mms://" files. There is a degredation in quality compared to the other formats and it records every sound your PC makes while it is recording so don't chat on AIM while recording (lol I can hear random doors slamming now).

Windows Power Tweaks

Configure Remote Access Client Account Lockout (Windows 2000/XP)

Configure Remote Access Client Account Lockout (Windows 2000/XP) You can use the remote access account lockout feature to specify how many times a remote access authentication has to fail against a valid user account before the user is denied access. Use this tweak to set the number of failed logins before the account is locked-out and the time before the lockout is reset.

HKEY_LOCAL_MACHINE\SYSTEM\CurrentControlSet\Services\RemoteAccess\
Parameters\AccountLockout

Disable the Ability to Right Click on the Desktop (All Windows)

This tweak removes the context menu that would normally appear when the user right clicks on the desktop or in the Explorer right results pane.
Open your registry and find or create the key below. Create a new DWORD value, or modify the existing value, called "NoViewContextMenu" and set it according to the value data below.
Exit your registry, you may need to restart or log out of Windows for the change to take effect.
User Key: [HKEY_CURRENT_USER\Software\Microsoft\Windows\CurrentVersion\Policies\Explorer]System Key: [HKEY_LOCAL_MACHINE\Software\Microsoft\Windows\CurrentVersion\Policies\Explorer]Value Name: NoViewContextMenuData Type: REG_DWORD (DWORD Value)Value Data: (0 = disabled, 1 = enabled

REGISTRY EDITINGS
To open Windows Registry:
1. Click Start and Run
2. type "regedit" (without quotes)

[u]Enabling DVD Functionality in Media Player:
HKEY_CURRENT_USER\Software\Microsoft\MediaPlayer\Player\Settings. Value Name: EnableDVDUI, Data Type: REG_SZ (String Value), Value Data: yes or no. Create a new string value called "EnableDVDUI" and set it to "yes" to enable DVD functionality.

How to Increase Shutdown Time For Services To Close Properly:
HKEY_LOCAL_MACHINE\SYSTEM\CurrentControlSet\Control. On the Edit menu, click Add Value. Value Name: WaitToKillServiceTimeout, Data Type: REG_SZ , String: In milli-seconds; default is 20,000. Ok/Exit/Reboot.

Speed Up Menu Display:
HKEY_CURRENT_USER\Control Panel\Desktop In the right pane select, "MenuShowDelay". Right click, modify and set the value to 100. Reboot.

Speed Up Browsing (Windows Explorer and IE):
HKEY_LOCAL_MACHINE\Software\Microsoft\Windows\CurrentVersion\Explorer\RemoteComputer\NameSpace In the left pane find: {D6277990-4C6A-11CF-8D87-00AA0060F5BF} Value and delete it.

Activate Clear Type on the Welcome Screen:
HKEY_USERS/.DEFAULT/Control Panel/Desktop. In the right pane, right click "FontSmoothingType", modify, change the value to 2.

Change the Text in Internet Explorers Title Bar:
HKEY_CURRENT_USER\Software\Microsoft\Internet Explorer\Main. In the right pane, change the value of the string, "WindowTitle".

How to Change Name and Company Information After You Install Win XP:
HKEY_LOCAL_MACHINE\SOFTWARE\Microsoft\Windows NT\CurrentVersion In the right pane, double-click RegisteredOrganization. Under "Value data", type the name that you want, and then click OK. To change the name of the registered owner, do the following: In the right pane, double-click RegisteredOwner. Under "Value data", type the name that you want, and then click OK/Exit.

Get Rid of the "Links" Folder in Favorites:
HKEY_CURRENT_USER\Software\Microsoft\Internet Explorer\Toolbar. Set the String value of "LinksFolderName" to equal a blank string. Open IE and delete the Links folder from the Favorites menu. The next time you start Internet Explorer the Links folder will not be recreated.

Run Explorer Full Screen
HKEY_CURRENT_USER\Console. In the right pane find FullScreen and modify the value to 1. Then go to: HKEY_CURRENT_USER\Software\Microsoft\InternetExplorer\Main. In the right pane find FullScreen and modify the value to yes. Exit/Reboot.

Configure Internet Downloads:
HKEY_CURRENT_USER\Software\Microsoft\Windows\CurrentVersion\Internet Settings. To increase the number of simultaneous connections that are allowed to 10, follow these steps: On the Edit menu, click Add Value , and then add the following registry values: "MaxConnectionsPer1_0Server"=Dword:0000000a "MaxConnectionsPerServer"=Dword:0000000a.

Disable Crash Control Auto Reboot:
HKEY_LOCAL_MACHINE\SYSTEM\CurrentControlSet\Control\CrashControl In the right pane, "AutoReboot" set the Value to 1. To disable set the value back to 0.

Disable Run Commands Specified in the Registry:
HKEY_LOCAL_MACHINE\Software\Microsoft\Windows\CurrentVersion\ Policies\Explorer. Value Name: DisableLocalMachineRun, DisableLocalMachineRunOnce, DisableCurrentUserRun, DisableCurrentUserRunOnce. Data Type: REG_DWORD (DWORD Value), Value Data: (0 = enable run, 1 = disable run). Create a new DWORD value for each of the optional values above depending on which Run function to stop and set the value to "1" to disable. Restart Windows for change to take effect.

Disable Low Disk Space Message:
HKEY_CURRENT_USER\Software\Microsoft\Windows\CurrentVersion\Policies\Explorer. Create or modify: NoLowDiskSpaceChecks REG_DWORD and set the value to 1. Logoff/Reboot.

Disable/Turn Off System Beeps:
HKEY_CURRENT_USER\Control Panel\Sound In the right pane, right click "Beeps", modify, set the value to no. Exit, reboot.

How to Burn DVD With Selectable Subtitles


I have searched for a long time how to successfully make one of those fancy DVD's with selectable sustitles. Since the internet is a great resource to find movies and subtitles I guess this tutorial/application will come in handy with a lot of people.

You can just download this application:

VSO ConvertXToDVD v2.1.5 Build 173


1.You add your video file to the project.
2.Use the drop-down menu and when you see something of subtitles just right click on it and add your subtitle file.
3.Convert the Movie to DVD
4.Burn it with the in-build DVD Burner
5.Take some popcorn
6.Enjoy watching your DVD

How To Improve Browsing Performance In Internet Explorer

The most common cause of poor performance in Internet Explorer is large pictures, sounds, videos, or other multimedia files that appear or are played automatically when you access a Web page. If you are using a slow connection to access the Internet, these files may take a long time to appear or be played. To improve browsing performance in Internet Explorer, you can prevent pictures, sounds, videos, and other multimedia files from appearing or being played automatically when you access Web pages. To do so, use the appropriate method.

Internet Explorer versions 5, 5.5, and 6
1. Start Internet Explorer, and then click Internet Options on the Tools menu.

2. On the Advanced tab, click to clear one or more of the following check boxes in the Multimedia area:

•Show Pictures (prevents pictures from appearing automatically)

•Play Sounds (prevents sounds from being played automatically)

•Play Videos (prevents videos from being played automatically)

•Play Animations (prevents animations from being played automatically)

3.Click Apply.

4.Disable the AutoComplete feature for forms and passwords:
a. On the Tools menu, click Internet Options.
b. Click the Content tab, and then click AutoComplete.
c. Click to clear the Forms and User names and passwords on forms check boxes, click OK, and then click OK.

5.Click the Security tab, and then click Custom Level.

6.Click Disable for one or more of the items in the following Active Content areas:
•ActiveX Controls and Plug-ins (prevents Internet Explorer from automatically using items that show active content)
•Java (prevents Internet Explorer from viewing Java programs automatically)

•ScriptingNOTE: If you disable ActiveX, Java, and scripting, you may not be able to view Web sites that use these features.

7.Click OK, and then click OK.


Windows and System settings

It is possible to modify some Windows and system settings that may help improve browsing performance in Internet Explorer. The following methods may help improve browsing performance in Internet Explorer.

Hard disk optimization :

You can use the Disk Cleanup tool to free some hard disk space. Additional disk space may help improve browsing performance for Internet Explorer.Refer microsoft article (http://support.microsoft.com/kb/186099/) Description of the Disk Cleanup tool You can also use ScanDisk to check the hard disk for problems that may be using disk space. To use ScanDisk:
1.Make sure the hard disk is not running in MS-DOS Compatibility mode. To check this:
a. Click Start, point to Settings, and then click Control Panel.
b. Double-click the System icon, and then click the Performance tab.
c. In the Performance status box, check for items that show MS-DOS Compatibility mode. For additional information about troubleshooting MS-DOS Compatibility mode issues refer the link (http://support.microsoft.com/kb/130179/) Troubleshooting MS-DOS compatibility mode on hard disks
2. Click Start, click Run, type scandisk in the Open box, and then click OK.
3. Click the drive you want to scan, and then click Start

Windows virtual memory

Allow Windows to manage the virtual memory on your computer. To enable virtual memory:

1.Click Start, point to Settings, and then click Control Panel.
2.Double-click System, click the Performance tab, and then click Virtual Memory.
3.Click Let Windows manage my virtual memory settings. (Recommended).
4.Click OK, click Close, and then click Yes when you are prompted to restart your computer.

Video adapter driver and resolution
Updating your video adapter driver or lowering the display resolution may help improve browsing in Internet Explorer. Check with the manufacturer of your video adapter to obtain the latest driver for the adapter. To lower the display resolution:

1.Click Start, point to Settings, and then click Control Panel.
2.Double-click the Display icon, and then click the Settings tab.
3.In the Screen Area box, click a lower resolution, and then click OK.

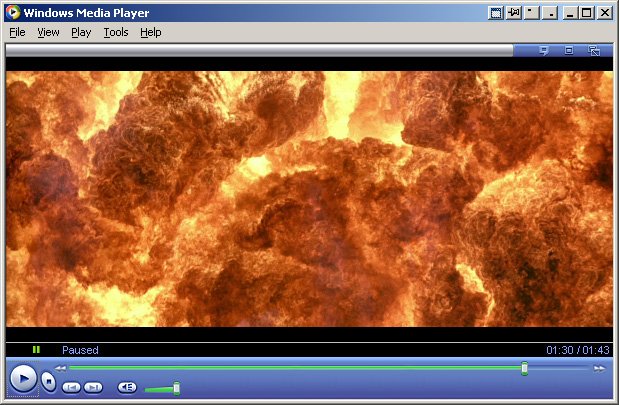
Whenever you wanna take a screenshot of a good movie or whatever you press "the print screen" button and all you see is a black screen. Well, not anymore.

All you have to do is open you Windows Media Player (All Versions)
click on the right mouse button and goto Tools > Options... > In the tabs goto Performance
and down there you'll see "Video acceleration" move the button from full to NONE
Press Apply and you'r done!

7 Jan 2007

How To Upgrade a Playstation 3 Hard Drive Video

It has to be a 2.5 inch SATA hard drive. 5400RPM and 8MB Cache recommended.
Upgrades PS3 Hard drive to any size SATA 2.5" HDD, from 20GB to 200GB (200GB max so far).

23 Ways To Speed Up Windows XP

Since defragging the disk won't do much to improve Windows XP performance, here are 23 suggestions that will. Each can enhance the performance and reliability of your customers' PCs. Best of all, most of them will cost you nothing.

1.) To decrease a system's boot time and increase system performance, use the money you save by not buying defragmentation software -- the built-in Windows defragmenter works just fine -- and instead equip the computer with an Ultra-133 or Serial ATA hard drive with 8-MB cache buffer.

2.) If a PC has less than 512 MB of RAM, add more memory. This is a relatively inexpensive and easy upgrade that can dramatically improve system performance.

3.) Ensure that Windows XP is utilizing the NTFS file system. If you're not sure, here's how to check: First, double-click the My Computer icon, right-click on the C: Drive, then select Properties. Next, examine the File System type; if it says FAT32, then back-up any important data. Next, click Start, click Run, type CMD, and then click OK. At the prompt, type CONVERT C: /FS:NTFS and press the Enter key. This process may take a while; it's important that the computer be uninterrupted and virus-free. The file system used by the bootable drive will be either FAT32 or NTFS. I highly recommend NTFS for its superior security, reliability, and efficiency with larger disk drives.

4.) Disable file indexing. The indexing service extracts information from documents and other files on the hard drive and creates a "searchable keyword index." As you can imagine, this process can be quite taxing on any system.

The idea is that the user can search for a word, phrase, or property inside a document, should they have hundreds or thousands of documents and not know the file name of the document they want. Windows XP's built-in search functionality can still perform these kinds of searches without the Indexing service. It just takes longer. The OS has to open each file at the time of the request to help find what the user is looking for.

Most people never need this feature of search. Those who do are typically in a large corporate environment where thousands of documents are located on at least one server. But if you're a typical system builder, most of your clients are small and medium businesses. And if your clients have no need for this search feature, I recommend disabling it.

Here's how: First, double-click the My Computer icon. Next, right-click on the C: Drive, then select Properties. Uncheck "Allow Indexing Service to index this disk for fast file searching." Next, apply changes to "C: subfolders and files," and click OK. If a warning or error message appears (such as "Access is denied"), click the Ignore All button.

5.) Update the PC's video and motherboard chipset drivers. Also, update and configure the BIOS. For more information on how to configure your BIOS properly, see this article on my site.

6.) Empty the Windows Prefetch folder every three months or so. Windows XP can "prefetch" portions of data and applications that are used frequently. This makes processes appear to load faster when called upon by the user. That's fine. But over time, the prefetch folder may become overloaded with references to files and applications no longer in use. When that happens, Windows XP is wasting time, and slowing system performance, by pre-loading them. Nothing critical is in this folder, and the entire contents are safe to delete.

7.) Once a month, run a disk cleanup. Here's how: Double-click the My Computer icon. Then right-click on the C: drive and select Properties. Click the Disk Cleanup button -- it's just to the right of the Capacity pie graph -- and delete all temporary files.

8.) In your Device Manager, double-click on the IDE ATA/ATAPI Controllers device, and ensure that DMA is enabled for each drive you have connected to the Primary and Secondary controller. Do this by double-clicking on Primary IDE Channel. Then click the Advanced Settings tab. Ensure the Transfer Mode is set to "DMA if available" for both Device 0 and Device 1. Then repeat this process with the Secondary IDE Channel.

9.) Upgrade the cabling. As hard-drive technology improves, the cabling requirements to achieve these performance boosts have become more stringent. Be sure to use 80-wire Ultra-133 cables on all of your IDE devices with the connectors properly assigned to the matching Master/Slave/Motherboard sockets. A single device must be at the end of the cable; connecting a single drive to the middle connector on a ribbon cable will cause signaling problems. With Ultra DMA hard drives, these signaling problems will prevent the drive from performing at its maximum potential. Also, because these cables inherently support "cable select," the location of each drive on the cable is important. For these reasons, the cable is designed so drive positioning is explicitly clear.

10.) Remove all spyware from the computer. Use free programs such as AdAware by Lavasoft or SpyBot Search & Destroy. Once these programs are installed, be sure to check for and download any updates before starting your search. Anything either program finds can be safely removed. Any free software that requires spyware to run will no longer function once the spyware portion has been removed; if your customer really wants the program even though it contains spyware, simply reinstall it. For more information on removing Spyware visit this Web Pro News page.

11.) Remove any unnecessary programs and/or items from Windows Startup routine using the MSCONFIG utility. Here's how: First, click Start, click Run, type MSCONFIG, and click OK. Click the StartUp tab, then uncheck any items you don't want to start when Windows starts. Unsure what some items are? Visit the WinTasks Process Library. It contains known system processes, applications, as well as spyware references and explanations. Or quickly identify them by searching for the filenames using Google or another Web search engine.

12.) Remove any unnecessary or unused programs from the Add/Remove Programs section of the Control Panel.

13.) Turn off any and all unnecessary animations, and disable active desktop. In fact, for optimal performance, turn off all animations. Windows XP offers many different settings in this area. Here's how to do it: First click on the System icon in the Control Panel. Next, click on the Advanced tab. Select the Settings button located under Performance. Feel free to play around with the options offered here, as nothing you can change will alter the reliability of the computer -- only its responsiveness.

14.) If your customer is an advanced user who is comfortable editing their registry, try some of the performance registry tweaks offered at Tweak XP.

15.) Visit Microsoft's Windows update site regularly, and download all updates labeled Critical. Download any optional updates at your discretion.

16.) Update the customer's anti-virus software on a weekly, even daily, basis. Make sure they have only one anti-virus software package installed. Mixing anti-virus software is a sure way to spell disaster for performance and reliability.

17.) Make sure the customer has fewer than 500 type fonts installed on their computer. The more fonts they have, the slower the system will become. While Windows XP handles fonts much more efficiently than did the previous versions of Windows, too many fonts -- that is, anything over 500 -- will noticeably tax the system.

18.) Do not partition the hard drive. Windows XP's NTFS file system runs more efficiently on one large partition. The data is no safer on a separate partition, and a reformat is never necessary to reinstall an operating system. The same excuses people offer for using partitions apply to using a folder instead. For example, instead of putting all your data on the D: drive, put it in a folder called "D drive." You'll achieve the same organizational benefits that a separate partition offers, but without the degradation in system performance. Also, your free space won't be limited by the size of the partition; instead, it will be limited by the size of the entire hard drive. This means you won't need to resize any partitions, ever. That task can be time-consuming and also can result in lost data.

19.) Check the system's RAM to ensure it is operating properly. I recommend using a free program called MemTest86. The download will make a bootable CD or diskette (your choice), which will run 10 extensive tests on the PC's memory automatically after you boot to the disk you created. Allow all tests to run until at least three passes of the 10 tests are completed. If the program encounters any errors, turn off and unplug the computer, remove a stick of memory (assuming you have more than one), and run the test again. Remember, bad memory cannot be repaired, but only replaced.

20.) If the PC has a CD or DVD recorder, check the drive manufacturer's Web site for updated firmware. In some cases you'll be able to upgrade the recorder to a faster speed. Best of all, it's free.

21.) Disable unnecessary services. Windows XP loads a lot of services that your customer most likely does not need. To determine which services you can disable for your client, visit the Black Viper site for Windows XP configurations.

22.) If you're sick of a single Windows Explorer window crashing and then taking the rest of your OS down with it, then follow this tip: open My Computer, click on Tools, then Folder Options. Now click on the View tab. Scroll down to "Launch folder windows in a separate process," and enable this option. You'll have to reboot your machine for this option to take effect.

23.) At least once a year, open the computer's cases and blow out all the dust and debris. While you're in there, check that all the fans are turning properly. Also inspect the motherboard capacitors for bulging or leaks. For more information on this leaking-capacitor phenomena, you can read numerous articles on my site.


Following any of these suggestions should result in noticeable improvements to the performance and reliability of your customers' computers. If you still want to defrag a disk, remember that the main benefit will be to make your data more retrievable in the event of a crashed drive.

New Apple iPhone Pictures and Sketches

Anyone excited about the new iPods and iPhones that are coming out in December. I am. Here are some photos and sketches of how the new iPhones work.

iPod Video Wireless
IPB Image

IPB Image

iPhone
IPB Image

How Hackers Use Google to Search And Attack


Searching Google for Music - Advanced Guide

*credit to my_haz for this superb guide on how to search Google.

This How-To will teach you how to use google to find mp3s. This How-To
will be highly pragmatic and will focus on the hows and not the
wherefores of the various search strings.

Index
----------------------------------------------------------------------
0) Key
1) Directories
2) Xitami Servers
3) Directory Listing
4) Andromeda Servers
5) Zina Artists
6) Apache mp3 Servers
7) Individual Songs


----------------------------------------------------------------------
Section 0 - KEY
----------------------------------------------------------------------

You this are just some definitions I will use below.

[Directory String] can be any of the following :
1) "index of"
2) "last modified"
3) "parent of"

[file type] can be any of the following :
1) "mp3"
2) "shn"
3) "wma"

[mp3 name] can be any of the following :
1) the name of the album in quotes
2) the name of the artist in quotes
3) be daring and leave it blank and have lots of links
4) be creative!

[limitors]
1) -html -htm -php -asp -txt -pls

(inurl:) is optional and may be omitted and in fact most be
omitted if not using a search tool other than google.

(intitle:) can be used in place of (inurl:) and has a similar effect
again you must be useing google.

(-filetype:txt) adding this to the end of your search string can
filter some false positives.

(-playlist) adding this to the end of your search string can
filter some false positives.

----------------------------------------------------------------------
Section 1 - Directories
----------------------------------------------------------------------

These are the most common way that mp3s are stored on the www, you
should try these strings first.

String Format :
Type 1 : [Directory String] + (inurl:)[file type] + [mp3 name]
Type 2 : [Directory String] + (intitle:)[file type] + [mp3 name]

Type 3 : [Directory String] + [file type] + [mp3 name] + [limitors]

Example Strings :
- intitle:index.of + mp3 + "grandaddy" -html -htm -php -asp -txt -pls
- "index of" + "mp3" + "radiohead" -html -htm -php
- "index of" + mp3 + "grandaddy"
- "index of" + inurl:mp3 + "beatles" -txt -pls
- "index of" + intitle:mp3 + beatles
- "last modified" + "shn" + "dylan"
- "last modified" + inurl:shn + "bob dylan"
- "parent of" + inurl:wma + "grandaddy"

Suggestions :
- Try (intitle:index.of + "mp3" + "band name" -htm -html -php -asp) first it
is usually the most effective.

Another Little Trick:
- If you have been getting alot of results on google but the pages don't seem
to be there try adding dates and the "apache" string to your search i.e.

- intitle:index.of + mp3 + "grandaddy" -html -htm -php -asp apache feb-2005
- intitle:index.of + mp3 + "grandaddy" -html -htm -php -asp apache 2005

or if you just want a big list of mp3' doing a search like this everymonth
- intitle:index.of + mp3 + -html -htm -php -asp apache mar

----------------------------------------------------------------------
Section 2 - Xitami Servers
----------------------------------------------------------------------

String Format :
Type 1 : "xitami web server" + (inurl:)[file type] + [mp3 name]
Type 2 : "xitami web server" + (intitle:)[file type] + [mp3 name]

Example Strings :
- "xitami web server" + "mp3" + "radiohead"
- "xitami web server" + intitle:shn + "beatles"
- "xitami web server" + inurl:mp3 + "magnetic fields"

----------------------------------------------------------------------
Section 3 - Directory Listing
----------------------------------------------------------------------

String Format :
Type 1 : "directory listings" + (inurl:)[file type] + [mp3 name]
Type 2 : "directory listings" + (intitle:)[file type] + [mp3 name]
Type 3 : "directory listings of" + (inurl:)[file type] + [mp3 name]
Type 4 : "directory listings of" + (intitle:)[file type] + [mp3 name]


Example Strings
- "directory listings" + "mp3" + "radiohead"
- "directory listings" + intitle:shn + "beatles"
- "directory listings" + inurl:mp3 + "magnetic fields"
- "directory listings of" + "mp3" + "radiohead"
- "directory listings of" + intitle:shn + "beatles"
- "directory listings of" + inurl:mp3 + "magnetic fields"

----------------------------------------------------------------------
Section 4 - Andromeda Servers
----------------------------------------------------------------------

String Format :
Type 1 : "scott matthews" + andromeda + [mp3 name]
Type 2 : "scott matthews" + andromeda + [file type] + [mp3 name]
Type 3 : "powered by andromeda" + [mp3 name]
Type 4 : "powered by andromeda" + [file type] + [mp3 name]
Type 5 : inurl:andromeda.php + [mp3 name]
Type 6 : inurl:anromeda.php + [file type] + [mp3 name]
Type 7 : "scott matthews"
Type 8 : "powered by andromeda"
Type 9 : inurl:andromeda.php

Examples :
- "scott matthews" + andromeda + "radiohead"
- "scott matthews" + andromeda + "mp3" + "fitter"
- "powered by andromeda" + "gradaddy"
- "powered by andromeda" + "mp3" + "just like women"
- inurl:andromeda.php + "shn"
- inurl:anromeda.php + "wma" + "dylan"
- "scott matthews"
- "powered by andromeda"
- inurl:andromeda.php

----------------------------------------------------------------------
Section 5 - Zina Artists
----------------------------------------------------------------------

String Format :
Type 1 : "zina artists"

Examples :
- "zina artists"

----------------------------------------------------------------------
Section 6 - Apache mp3 Servers
----------------------------------------------------------------------

String Format :
Type 1 : "stream all" + apache + [mp3 name]
Type 2 : "stream all" + apache
Type 3 : "shuffle all" + apache + [mp3 name]
Type 4 : "shuffle all" + apache

Examples :
- "stream all" + apache
- "stream all" "shuffle all" mp3
- "stream all" + apache + radiohead
- "shuffle all" + beatles

----------------------------------------------------------------------
Section 7 - Individual Songs
----------------------------------------------------------------------

Format : [mp3 name].mp3 -playlist -filetype:txt

Examples :
- "ok_computer_live.mp3" -playlist -filetype:txt
- "*ok_computer*.mp3" -playlist -filetype:txt
- kid*a.mp3 -playlist -filetype:txt

##########################################

2nd Method:

Here is a second example of maximizing search results on Google:

1. At Google Search, type in one of the following two phrases (try the first one; if you're not happy with the results, try the second one on your second search):

* "index of/mp3" -playlist -html -lyrics
* "index of/" mp3 -playlist -html -lyrics

2. If you'd like, add an artist's name or song name to the end of the phrase, then click the Search Button.
3. Here are a few examples:

* "index of/mp3" -playlist -html -lyrics beatles
* "index of/mp3" -playlist -html -lyrics punk

This tip helps you find directories filled with mp3 files by finding Apache's Index page:

1. At Google Search type in the following code:
2. +("index of") +("/mp3"|"/mp3s"|"/music") +(mp3|zip|rar) +apache
3. By editing this code, you can search for any type of media; oog, wav, pdf, etc.
4. Be sure to edit both the directory names as well as the file extensions if edited.

Finding mp3 and compressed files searching by title:

1. At Google Search type in the following code:
2. allinurl: +(mp3|rar|zip|tgz) TheTitle
3. Replace TheTitle with either a song title, artist name, or album.
4. Here are a few examples:
* allinurl: +(mp3|rar|zip|tgz) beatles
* allinurl: +(mp3|rar|zip|tgz) revolver
* allinurl: +(mp3|rar|zip|tgz) greatest hits
--------------------
& to find cell phone programs:

just type the following line in your google search box and see experience a new world of finding games

for games
"parent directory" nokia games -xxx -html -htm -php -shtml -opendivx -md5 -md5sums

for tones
"parent directory " nokia polyphonic -xxx -html -htm -php -shtml -opendivx -md5 -md5sums

for symbian games
"parent directory " symbian games -xxx -html -htm -php -shtml -opendivx -md5 -md5sums

for Wallpapers
"parent directory " nokia wallpapers -xxx -html -htm -php -shtml -opendivx -md5 -md5sums

for general Midi
"parent directory " midi -xxx -html -htm -php -shtml -opendivx -md5 -md5sums

also try using "Index of" instead of "parent directory"
--------------------
and other tips:

You've probably seen some sites that allow you to Google their site for a certain term. This is accomplished via the "site" advanced operator. The following syntax is used for the site operator:

site:site_to_search

For example, if we wanted to search www.projectfearless.com
for the term "Nielsosky", we would use the following:

Nielsosky site:projectfearless.com

or

example:

site:blabla.com
----------------------------------------------------------

The "inurl" advanced operator is used to search for a term within
URL's. For example, searching for "inurl:binaryuniverse" searched
for all sites that have the term "binaryuniverse" in their URL.
The "intitle" is used to search for a term in the title. Thus,
"intitle:binaryuniverse" finds all pages with "binaryuniverse"
in their title.
------------------------------------------------------------
Google keeps caches of pages. When the Google spider indexes a page,
it stores a copy of it. Thus, the cache is a copy of what the page was
like at an earlier date. To view the cache for a page, you can simply
search for the page, and then click the "cache" link underneath.
However, there is a quicker way, that involves only typing in
search terms, and not clicking. Simply type "cache:pageurl.com"
to view the cache of a page (in this case pageurl.com).
------------------------------------------------------------
Google also allows you to search for pages of a certain filetype,
using the syntax "filetype:TYPE". Replace 'TYPE' with the file type
you want to search for. So, if you wanted to search for tutorials
on SQL that are in PDF format, you would search for the following:

SQL Tutorial filetype:PDF
--------------------------------------------------------------

Not only is Google the world's best search engine, it also happens
to be a mighty fine dictionary. To use it as a dictionary, just type
"define:TERM", and replace TERM with the word you wish to look up.
For example, if you want to look up "roflmao", type "define:roflmao",
without the quotes. This will give you several different resources
for definitions or roflmao. Fyi, roflmao means "rolling on the floor laughing my ass off".
----------------------------------------------------------------
And now, it's time for some fun -- Google whacking. Actually, after
a couple minutes, I have found Google whacking to become extremely
boring, not to mention frustrating. A google whack is a two-word query
that returns one result. You may not use quotes, and both words in
the query must be real words. And yes, it is very hard.
For more info, I suggest you check out http://googlewhacking.com

At this point, the basics of Google have been covered, and you should
be a moderately good Googler.
--------------------
how to search for STUFF at google

method 1
put this string in google search:

"parent directory " /appz/ -xxx -html -htm -php -shtml -opendivx -md5 -md5sums

"parent directory " DVDRip -xxx -html -htm -php -shtml -opendivx -md5 -md5sums

"parent directory "Xvid -xxx -html -htm -php -shtml -opendivx -md5 -md5sums

"parent directory " Gamez -xxx -html -htm -php -shtml -opendivx -md5 -md5sums

"parent directory " MP3 -xxx -html -htm -php -shtml -opendivx -md5 -md5sums

"parent directory " Name of Singer or album -xxx -html -htm -php -shtml -opendivx -md5 -md5sums

Notice that i am only changing the word after the parent directory, change it to what you want and you will get a lot of stuff.

method 2
put this string in google search:

?intitle:index.of? mp3

You only need add the name of the song/artist/singer.
Example: ?intitle:index.of? mp3 jackson

method 3
put this string in google search:

inurl:microsoft filetype:???

method 4
put this string in google search:

intitle:index.of.???

method 5
put this string in google search:

"name of object"download
"name of object download"
free "name of object"download
free "name of object download"

Or just look for the filename(s).
and instead of using the inurl: tag, use site: that works too.

For Rapidshare:
http://www.google.com/search?q=+.zip+OR+.rar+OR+.pdf+site:rapidshare.de&hl=en&lr=&c2coff=1&as_qdr=all&start=510&sa=N

or movies:
http://www.google.com/search?q=+.wmv+OR+.avi+OR+.mpeg+OR+.rm+site:rapidshare.de&hl=en&lr=&as_qdr=all&start=10&sa=N

or music:
http://www.google.com/search?q=+.MP3+OR+.WMA+OR+.Ogg+OR+.rm+site:rapidshare.de&hl=en&lr=&as_qdr=all&start=10&sa=N

Just play with the extensions.
---------------------------------------------
E-Books

inurl:ebook.DDU | inurl:ebook.EEN | inurl:ebook.JGT | inurl:ebook.LiB | inurl:ebook.EAT

There's a few ways to differentiate from that to change the outcome in your favor as well. For example, you can take away the "inurl:" to get many hits on things like forum posts or BitTorrent links. (Helpful if you're looking for something rare.)

You can also add the file type you like (such as PDF, CHM, LIT, etc) to get a specialized search. Finally, don't forget to put () or else Google may get confused. When defining a OR statement, Google expects the () to surround it. For example, you could search for:

- (ebook.DDU | ebook.EEN | ebook.JGT | ebook.LiB | ebook.EAT )
or
- PDF (ebook.DDU | ebook.EEN | ebook.JGT | ebook.LiB | ebook.EAT )
or get fancy with
- (PDF | CHM | LIT | ZIP | RAR | ISO) (ebook.DDU | ebook.EEN | ebook.JGT | ebook.LiB | ebook.EAT)

You can also use "Parent Directory"+ in front of it but don't limit the search to Google, try several engines.

A nice site for Rabbits & webbits:

http://www.searchlores.org/rabbits.htm

added 6/6/05

Music Filetypes:
MP3
WMV
WAV
AIF
AIFF

Movie Filetypes:
MPG
MPEG
AVI
WMV
RM
MOV

Picture Filetypes:
JPG
JPEG
GIF
TIFF
TIF
PNG
BMP

Compressed Filetypes (Used to search for programs):
ZIP
RAR
ISO
BIN
EXE <- Be extremely careful when searching for EXE files, make sure you run a complete virus scan on any of the compressed filetypes. Document Filetypes: DOC RTF TXT PDF SWX These are just a few of the things that you can search for using Google. It is an extremely powerful tool that can be used to find just about anything you could ever want on the internet. While I am not condoning pirating and filesharing, I feel that the sharing of information is absolutely essential to the survival of the internet. After all, the internet was founded on the idea of sharing information, Google just allows us to index all of that information into an easily searched archive.